Rebuilding My 4×4 Keypad Project with ESP32 + ESPHome


Goodbye glitchy Arduino sketch, hello modern home-automation workflow.
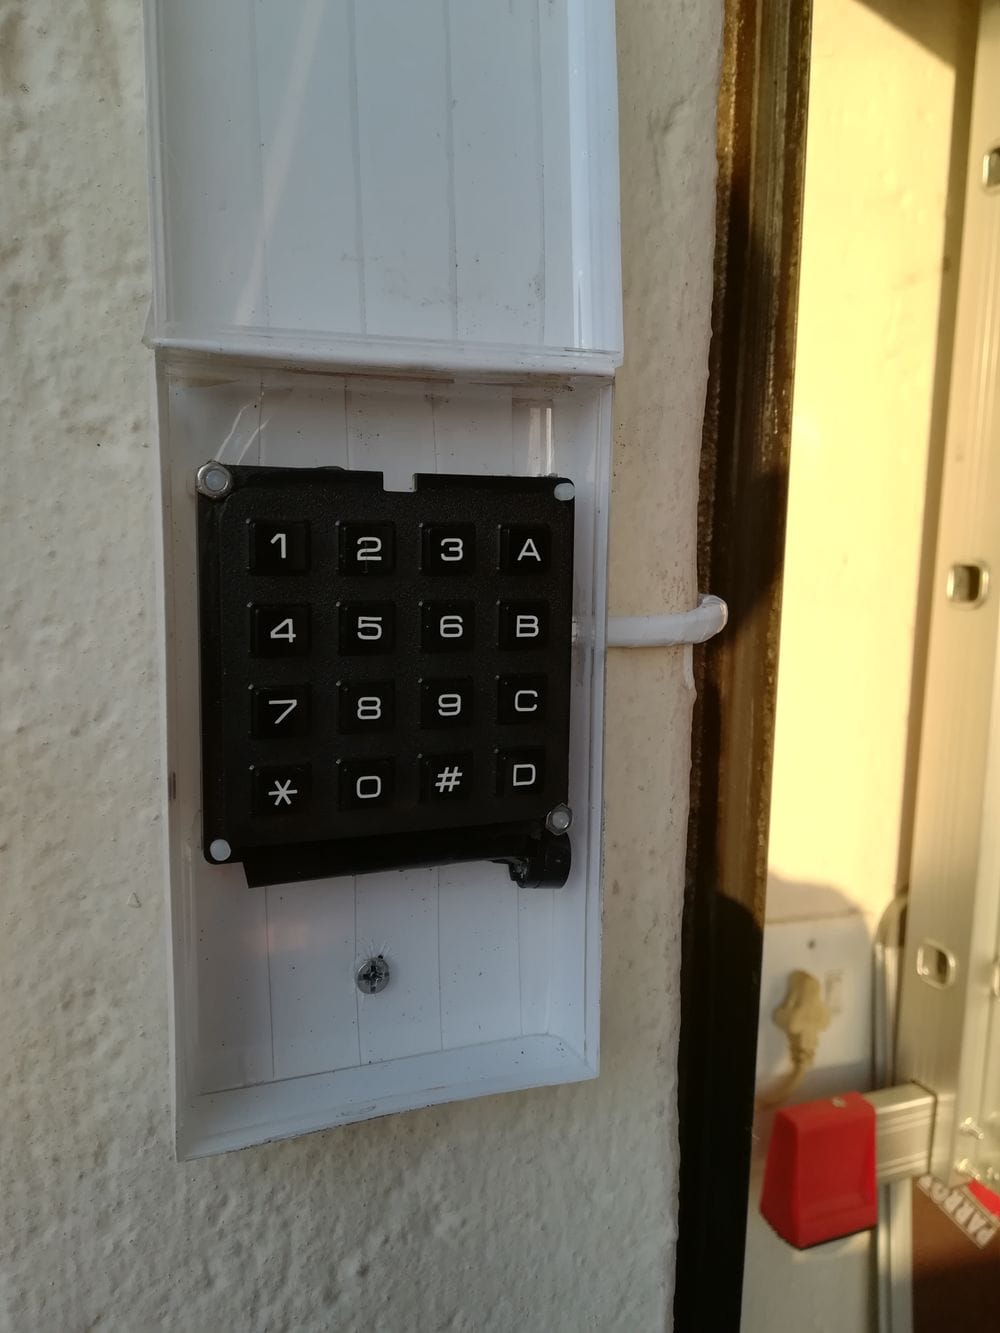
For the longest time, my back garage keypad setup was… let’s call it “functional-ish.” It ran on custom Arduino code tucked inside an old iPod enclosure, complete with a piezo buzzer hanging awkwardly inside the box. It worked—but only if you convinced it to.
Entering a code often meant smack-pressing Cancel and # repeatedly until the keypad woke up, like some kind of electronic ritual. It did the job, but it definitely wasn’t elegant and didn’t integrate cleanly with the rest of my ESPHome-based home automation stack.
So this year, I decided it was time for a full rebuild.
Reference to the OLD KEYPAD build.
Why Rebuild?
The old project had three main problems:
- Responsiveness issues – The matrix scanning code would occasionally lock up, and only mashing a combination of keys revived it.
- Messy enclosure – The iPod body was never meant for electronics, and the internal wiring looked like a bird nest.
- Poor integration – Custom Arduino code meant no api integration with Home Assistant, but rather only using MQTT Topics, and no easy configuration.
Moving to ESPHome solved all of this in one go.
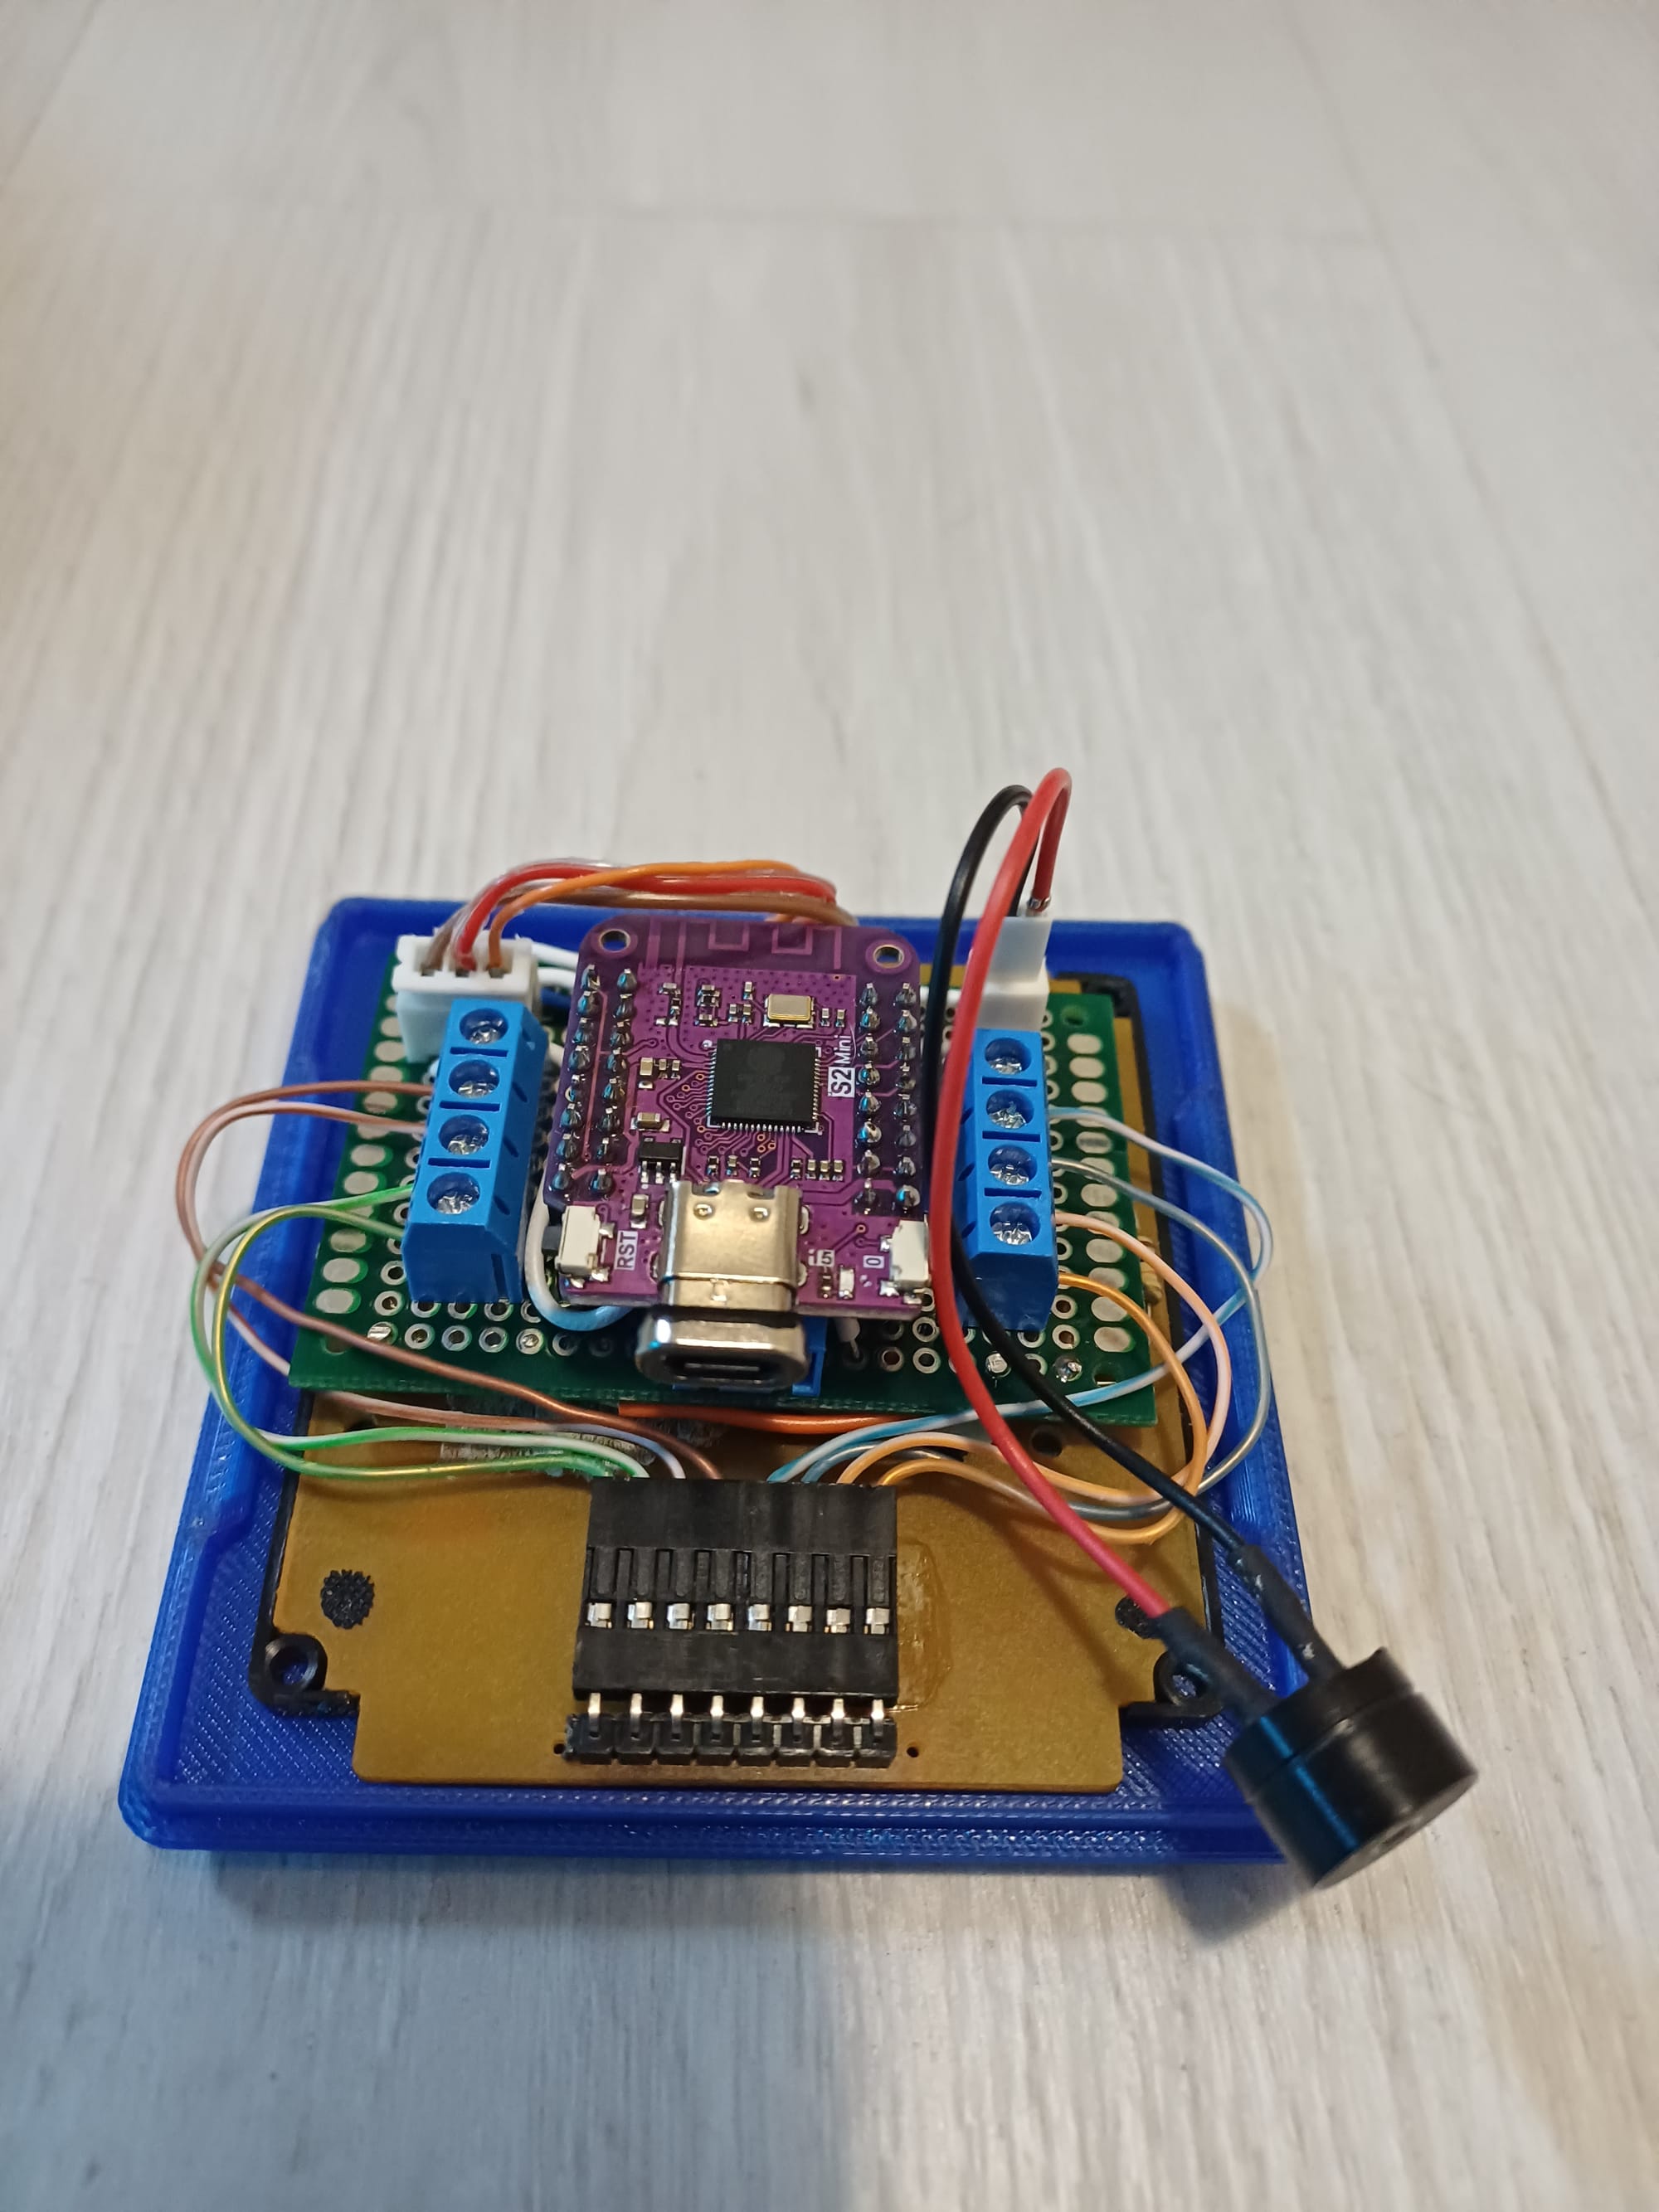
The New Approach: ESP32 + ESPHome
I rebuilt the system around:
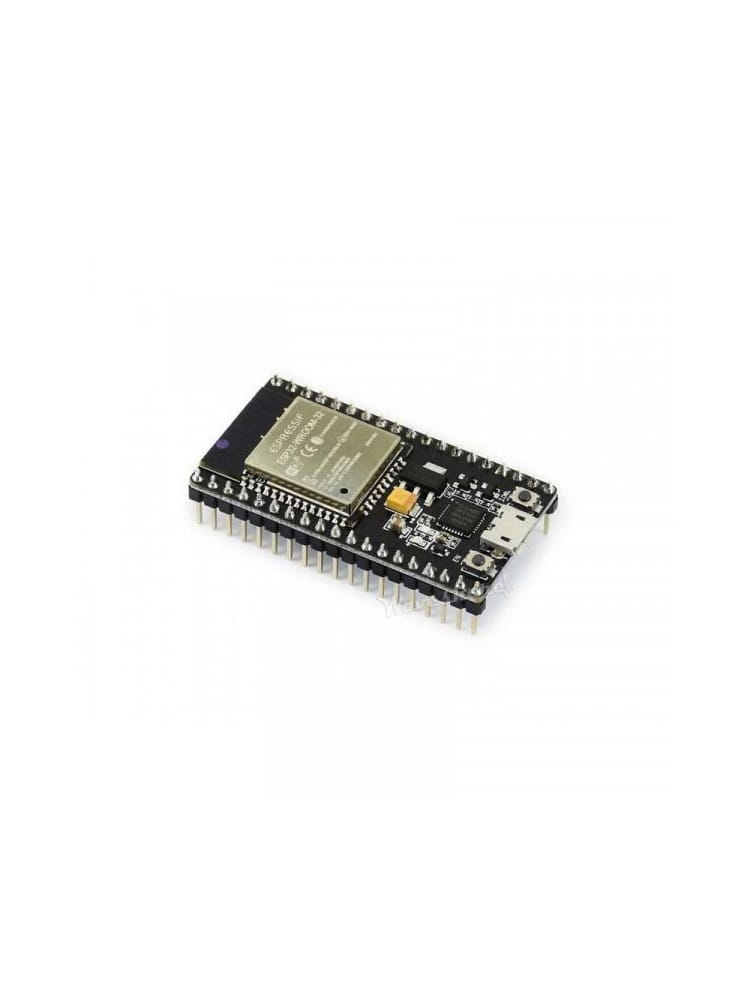
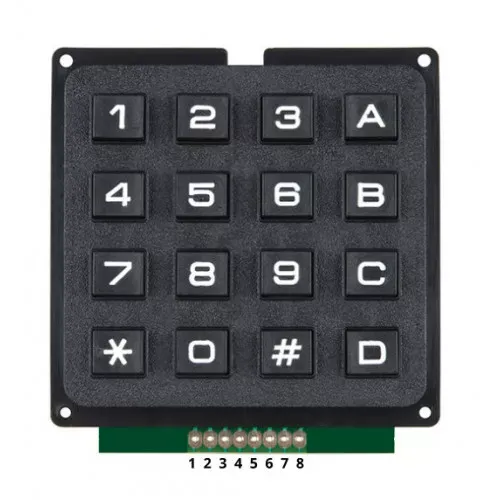
- An ESP32-WROOM-32 module
- A classic 4×4 matrix keypad
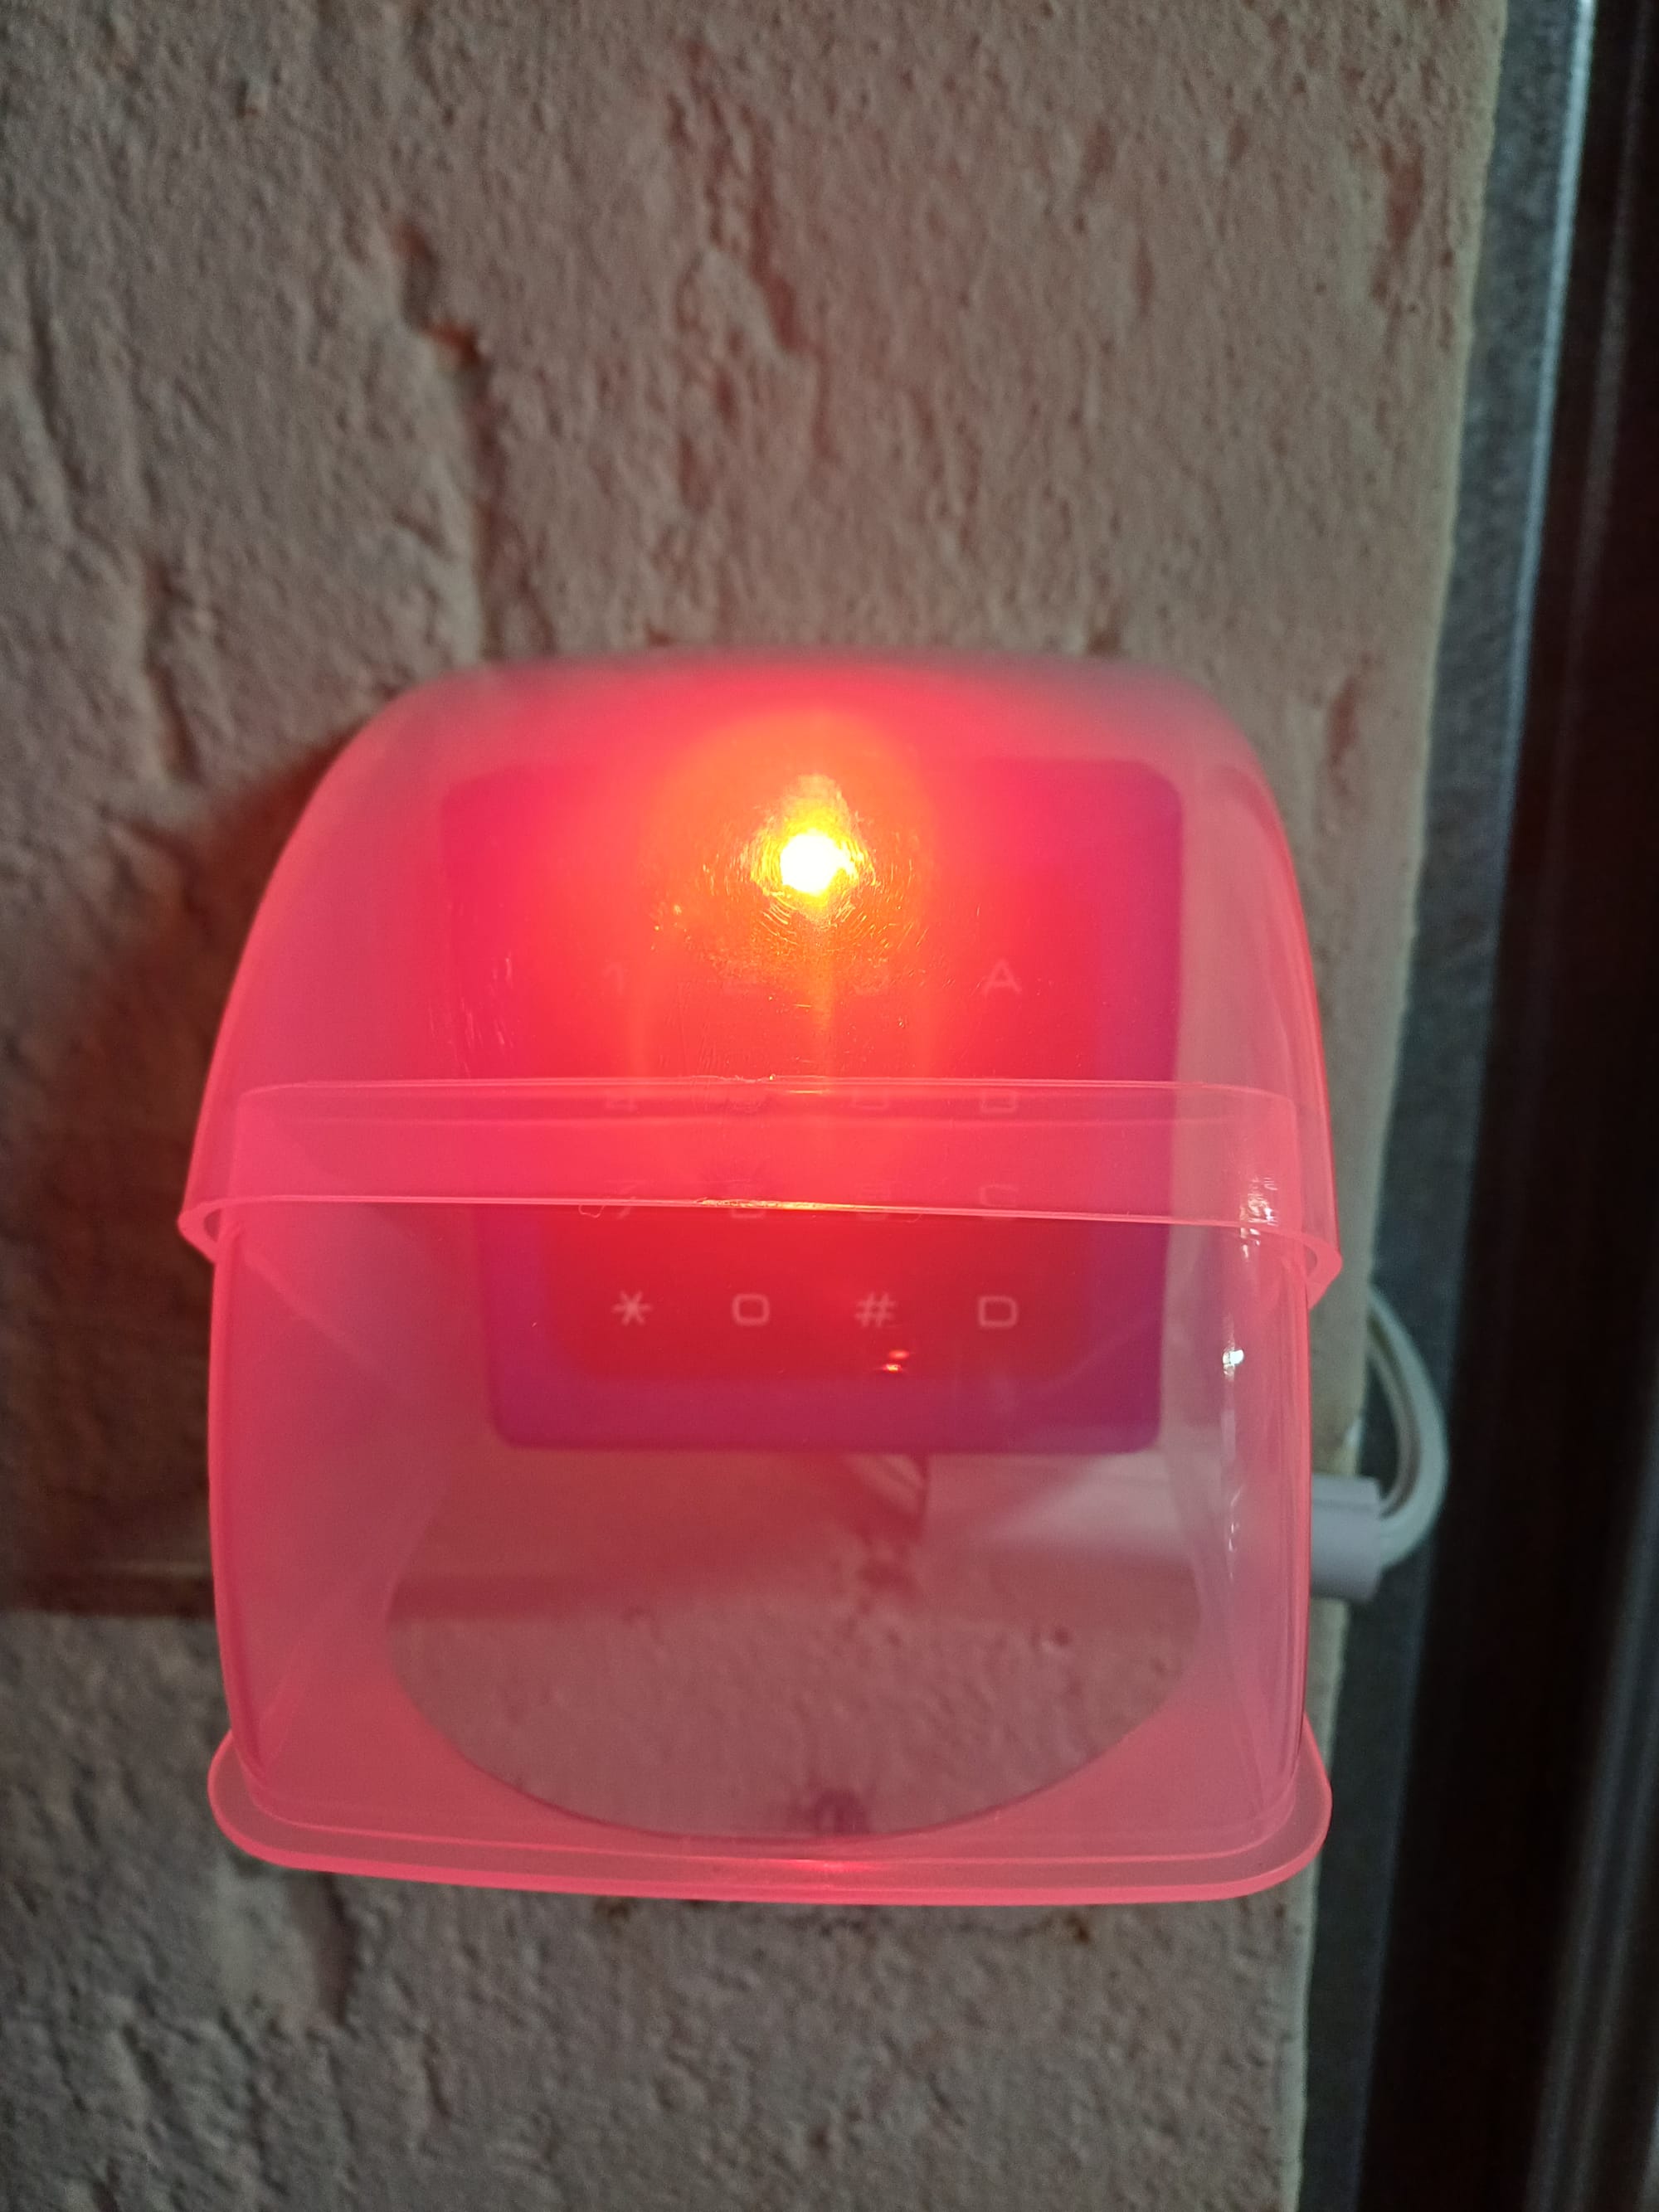
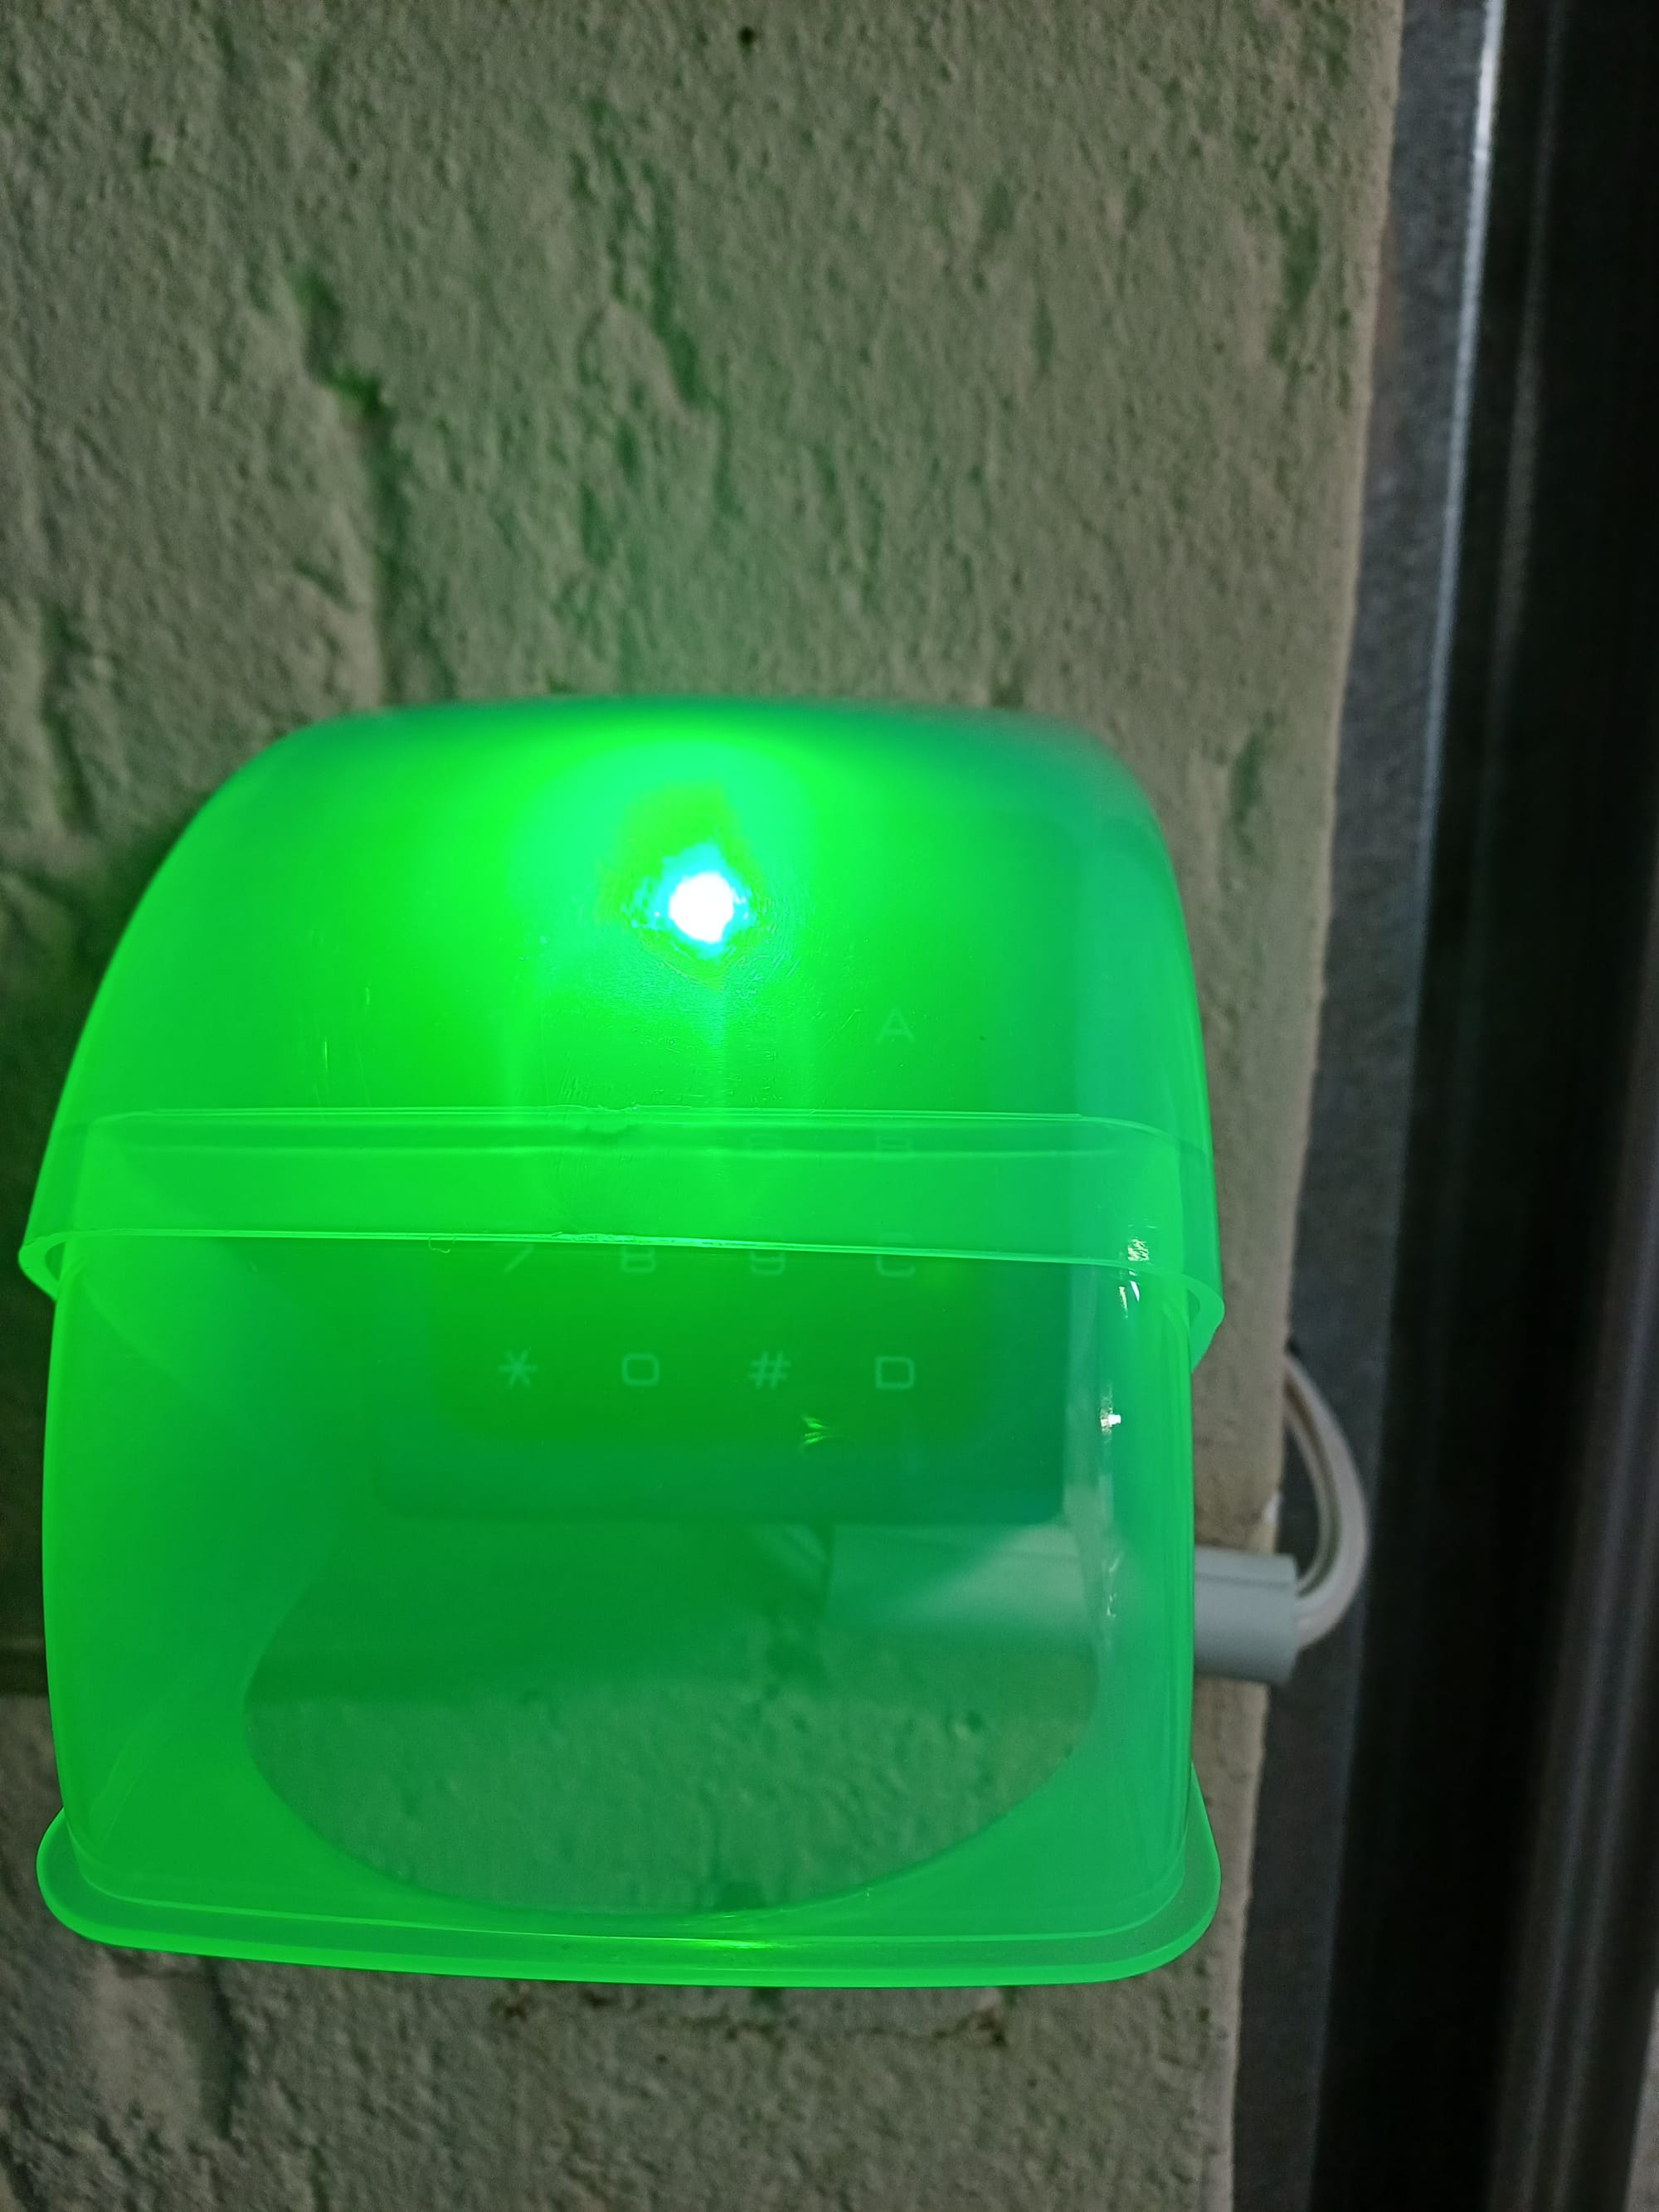
- A single WS2812B smart LED
- A piezo buzzer for audio feedback
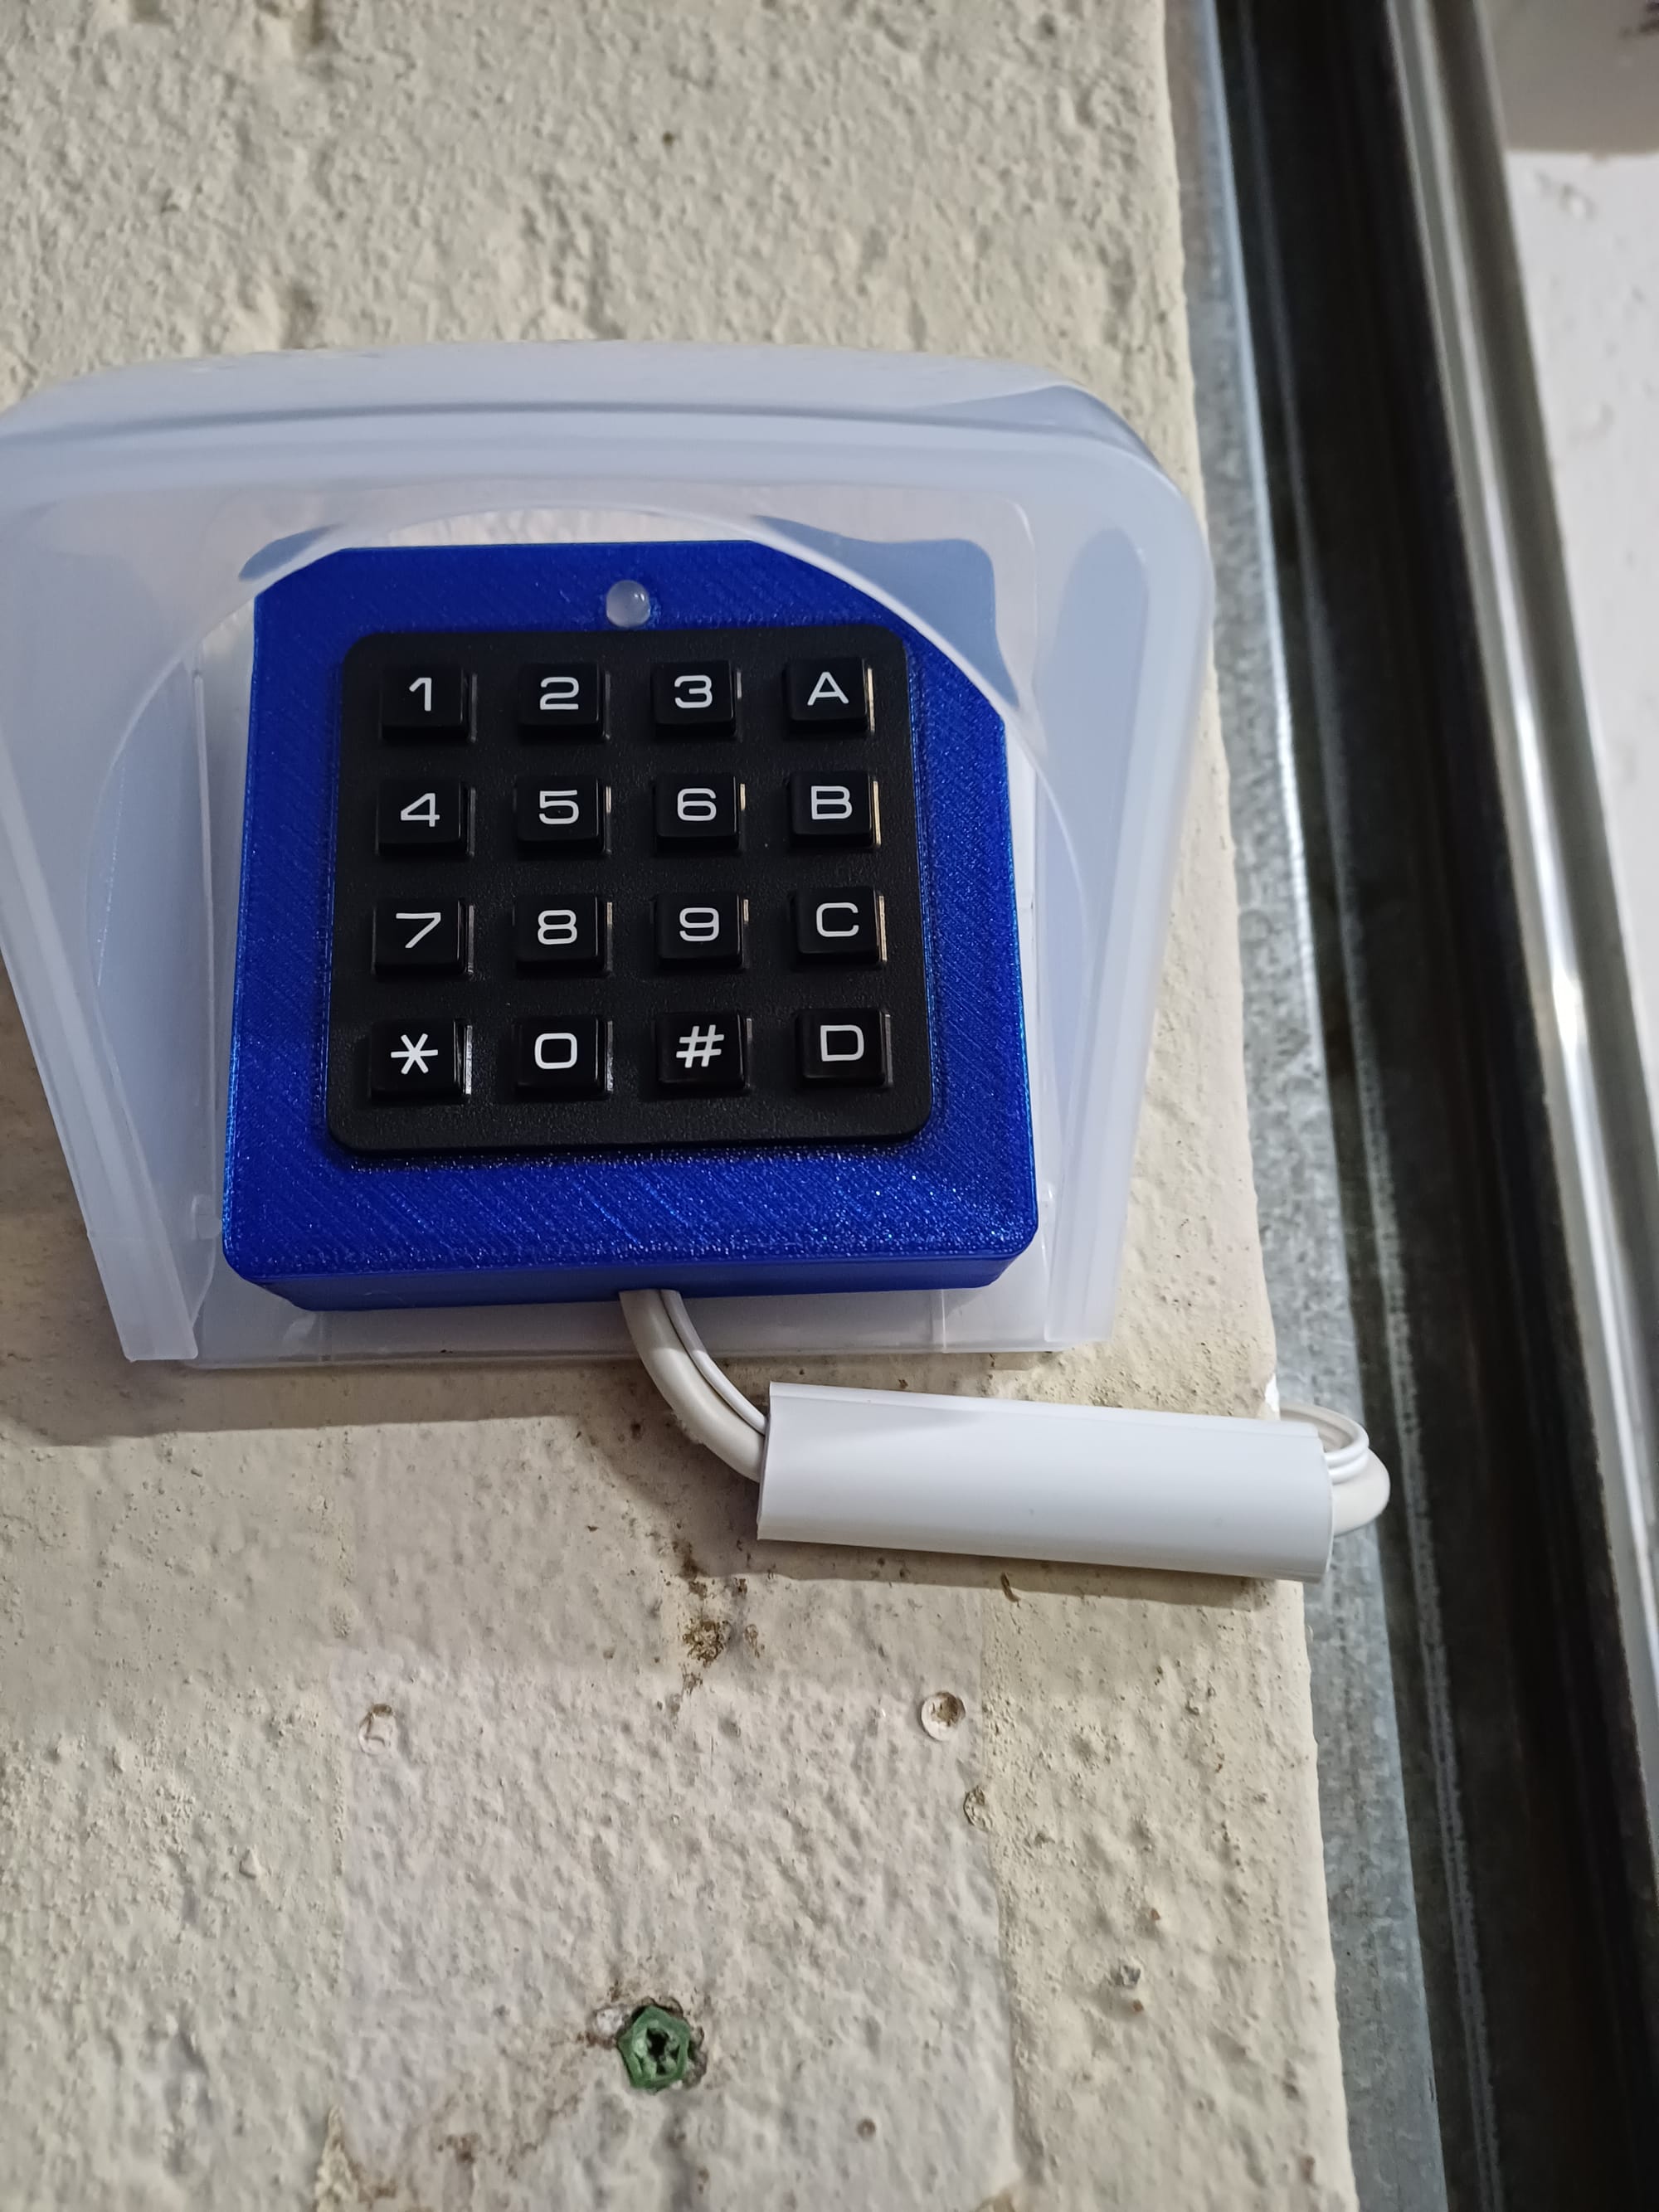
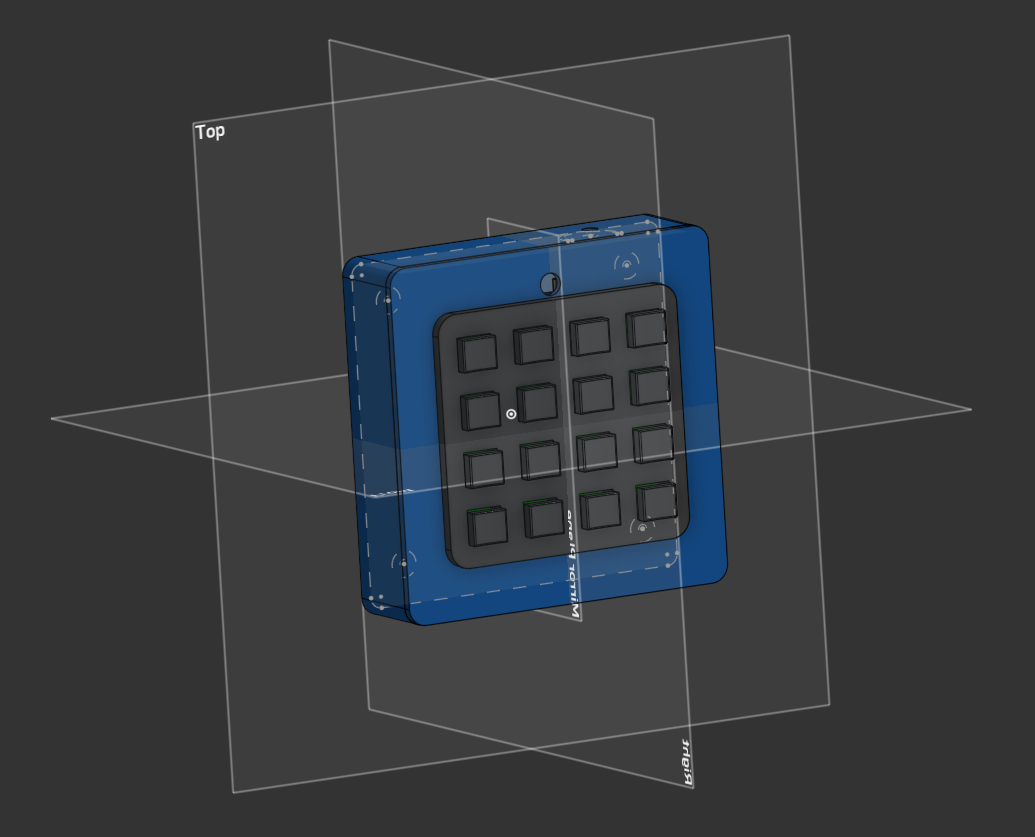
- A brand-new custom enclosure designed in Onshape and 3D printed in transparent royal-blue PETG
The combination works beautifully—clean wiring, stable performance, and most importantly, 100% responsiveness.
Keypad Logic in ESPHome
With ESPHome handling matrix scanning, debouncing, and state reporting, all the weird responsiveness issues instantly disappeared.
Now when a code is entered:
- Correct code:
- WS2812B lights up green
- Buzzer plays a short success melody
- Gate opens (via my ESP-based controller)
- Incorrect code:
- WS2812B lights up red
- A short “error” beep plays
Everything feels snappy and polished—exactly what I originally wanted.
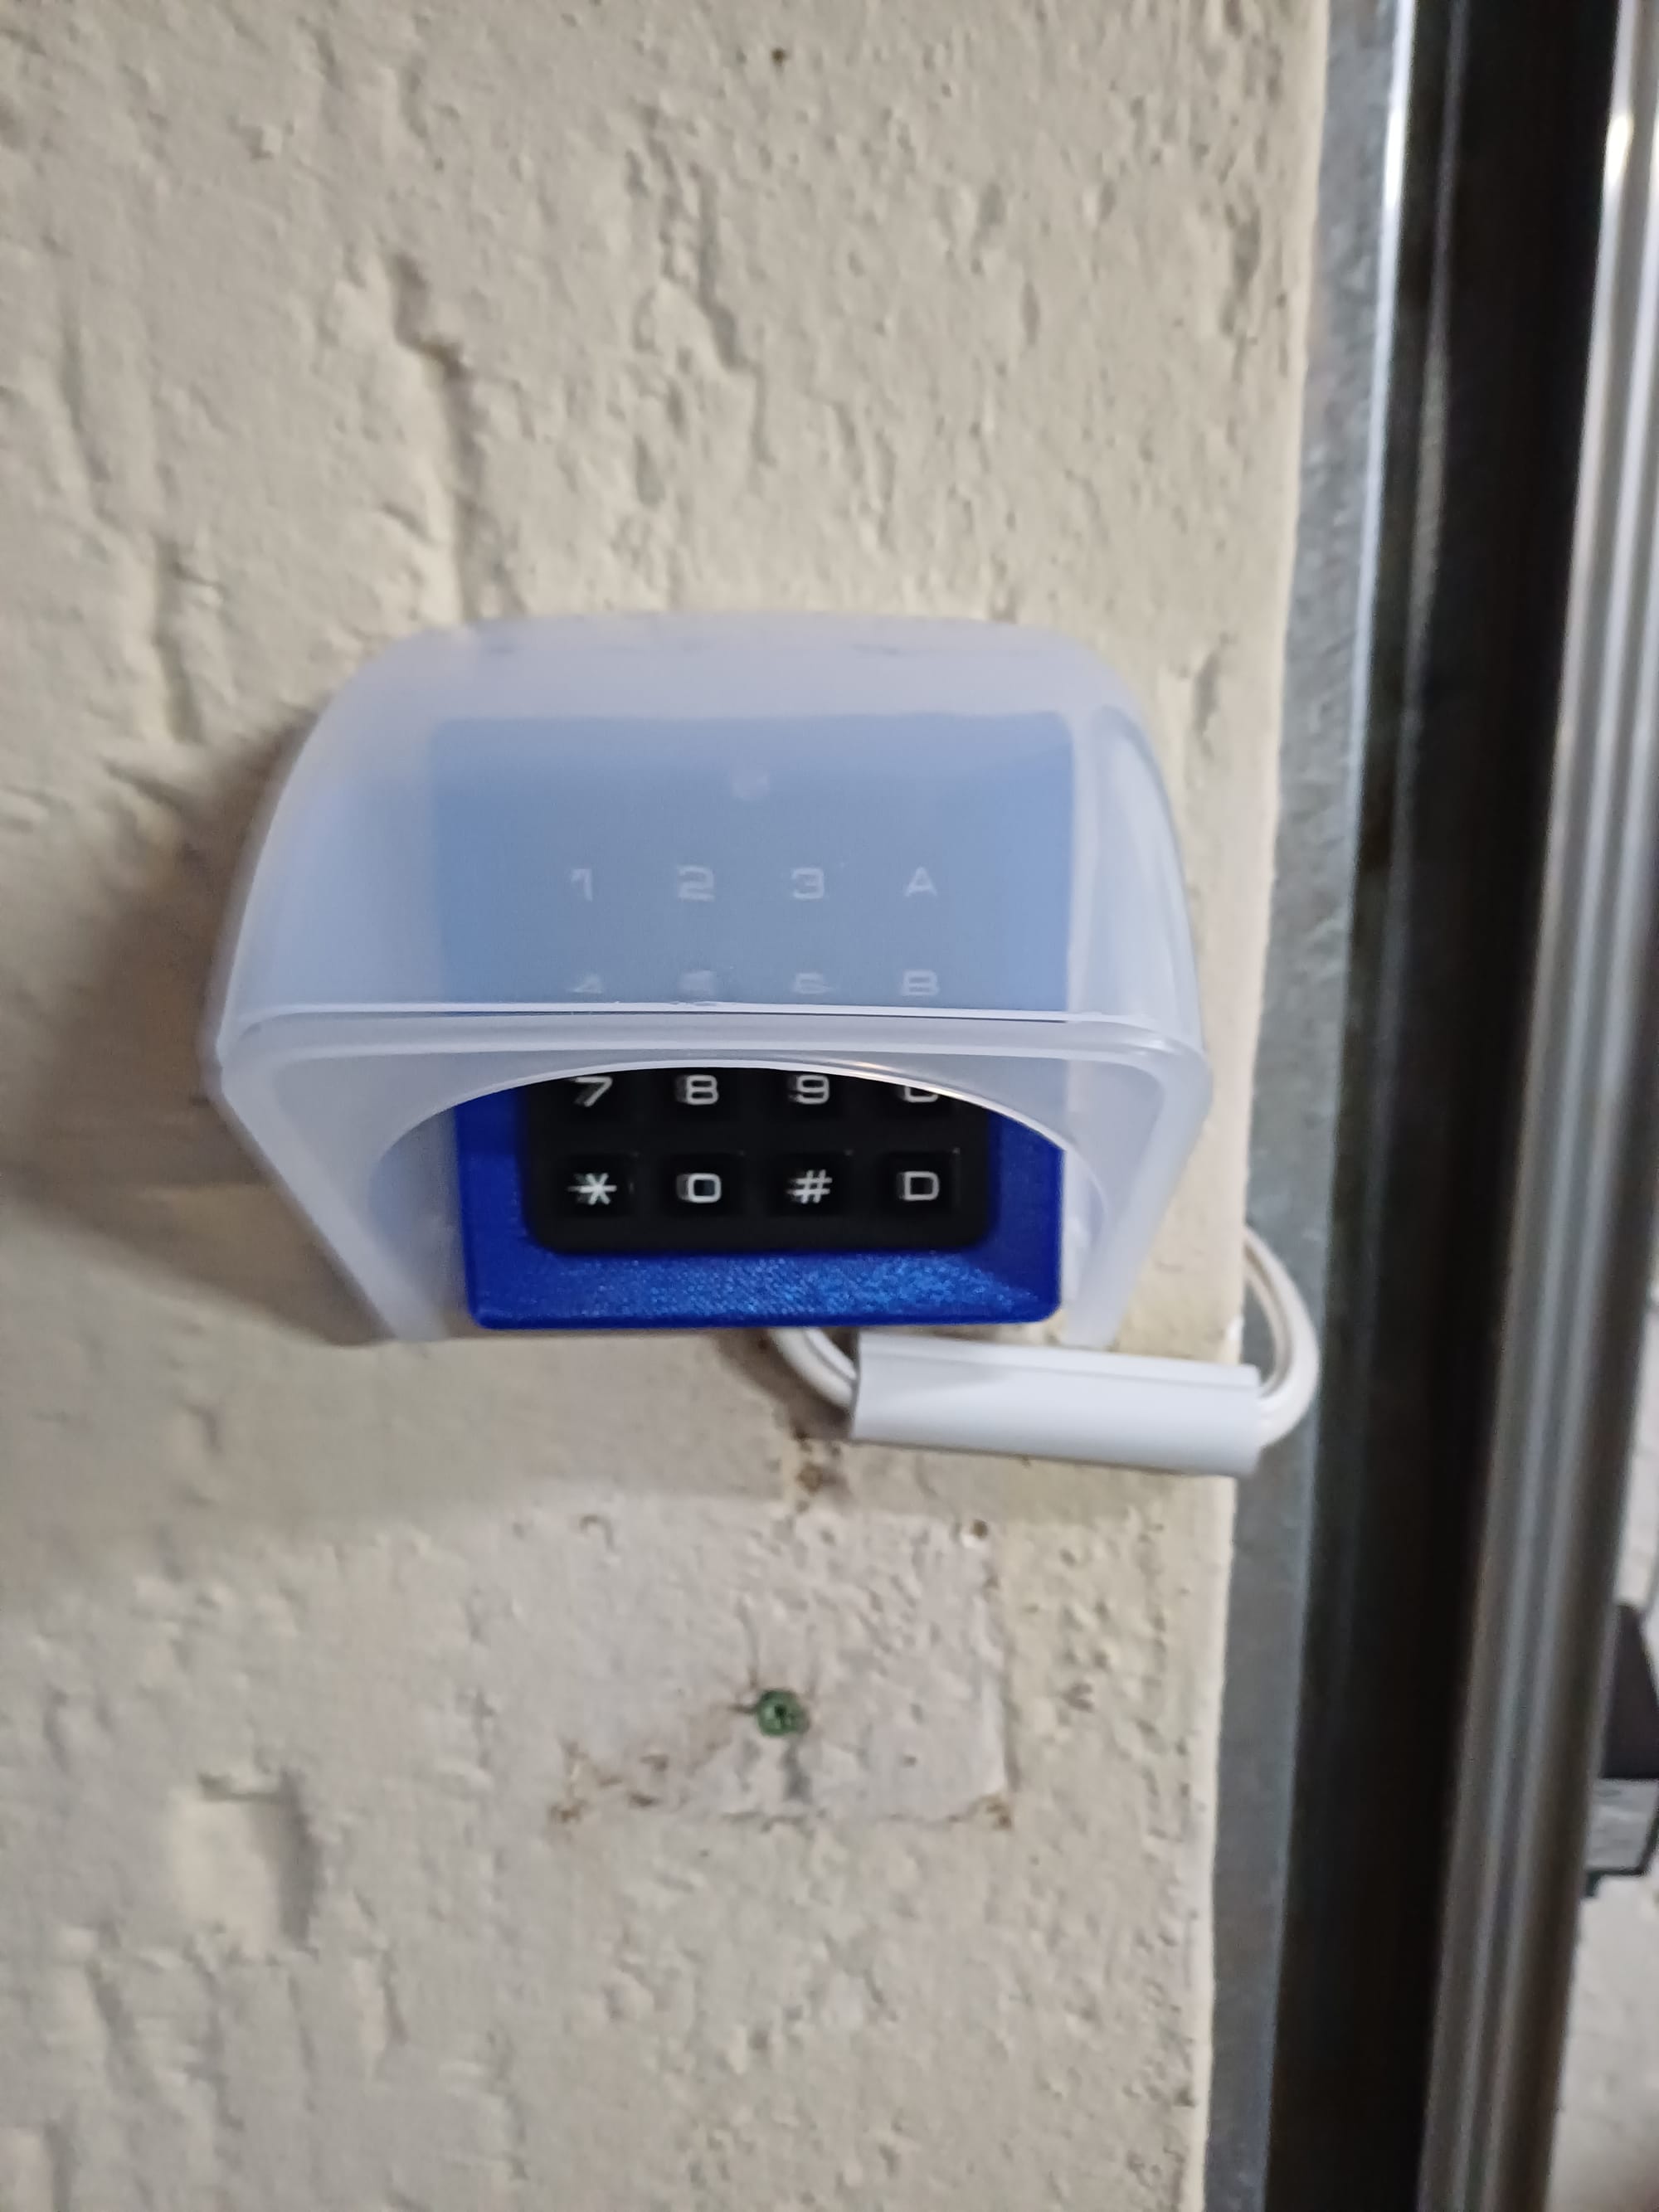
Designing a Proper Enclosure (Onshape → PETG)
This project was also my first real dive into Onshape, and honestly, I was surprised at how quickly I could design:
- A dedicated keypad housing
- An ESP32 S2 Mini compartment
- Mounting brackets
- A sealed faceplate with LED
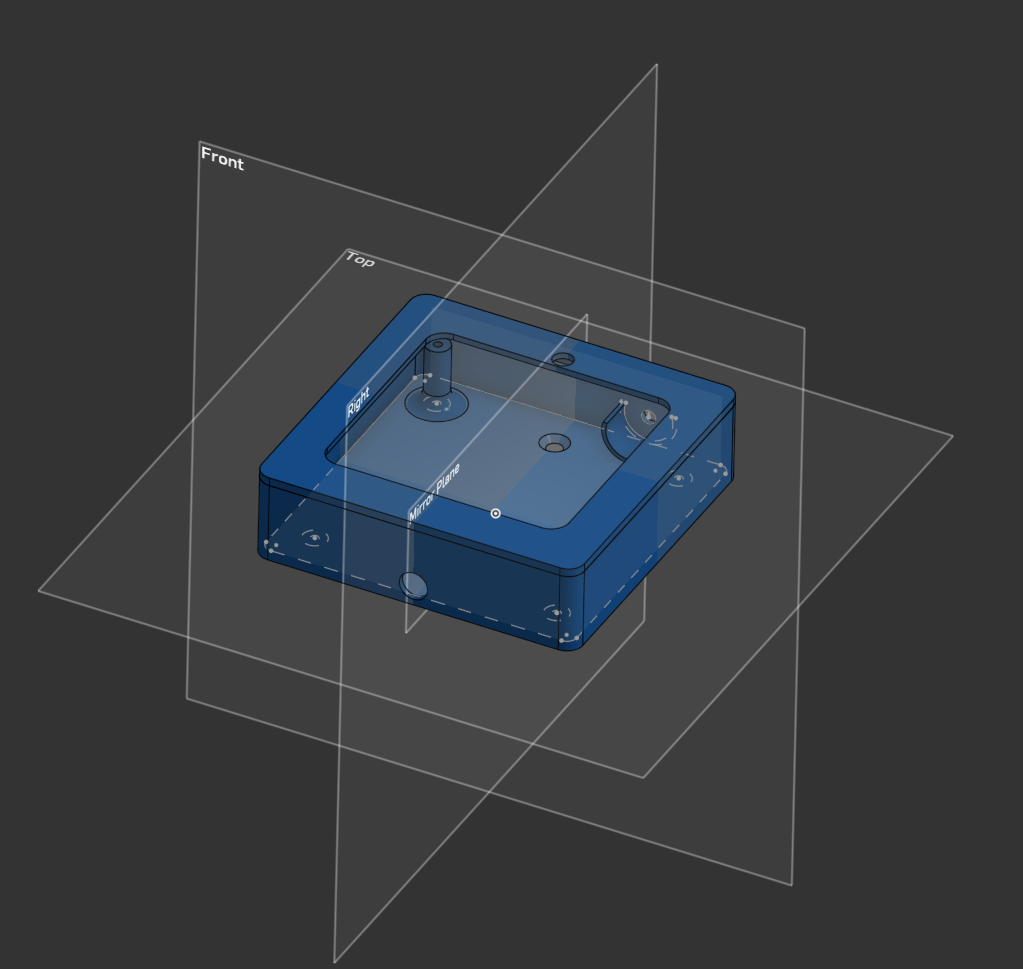
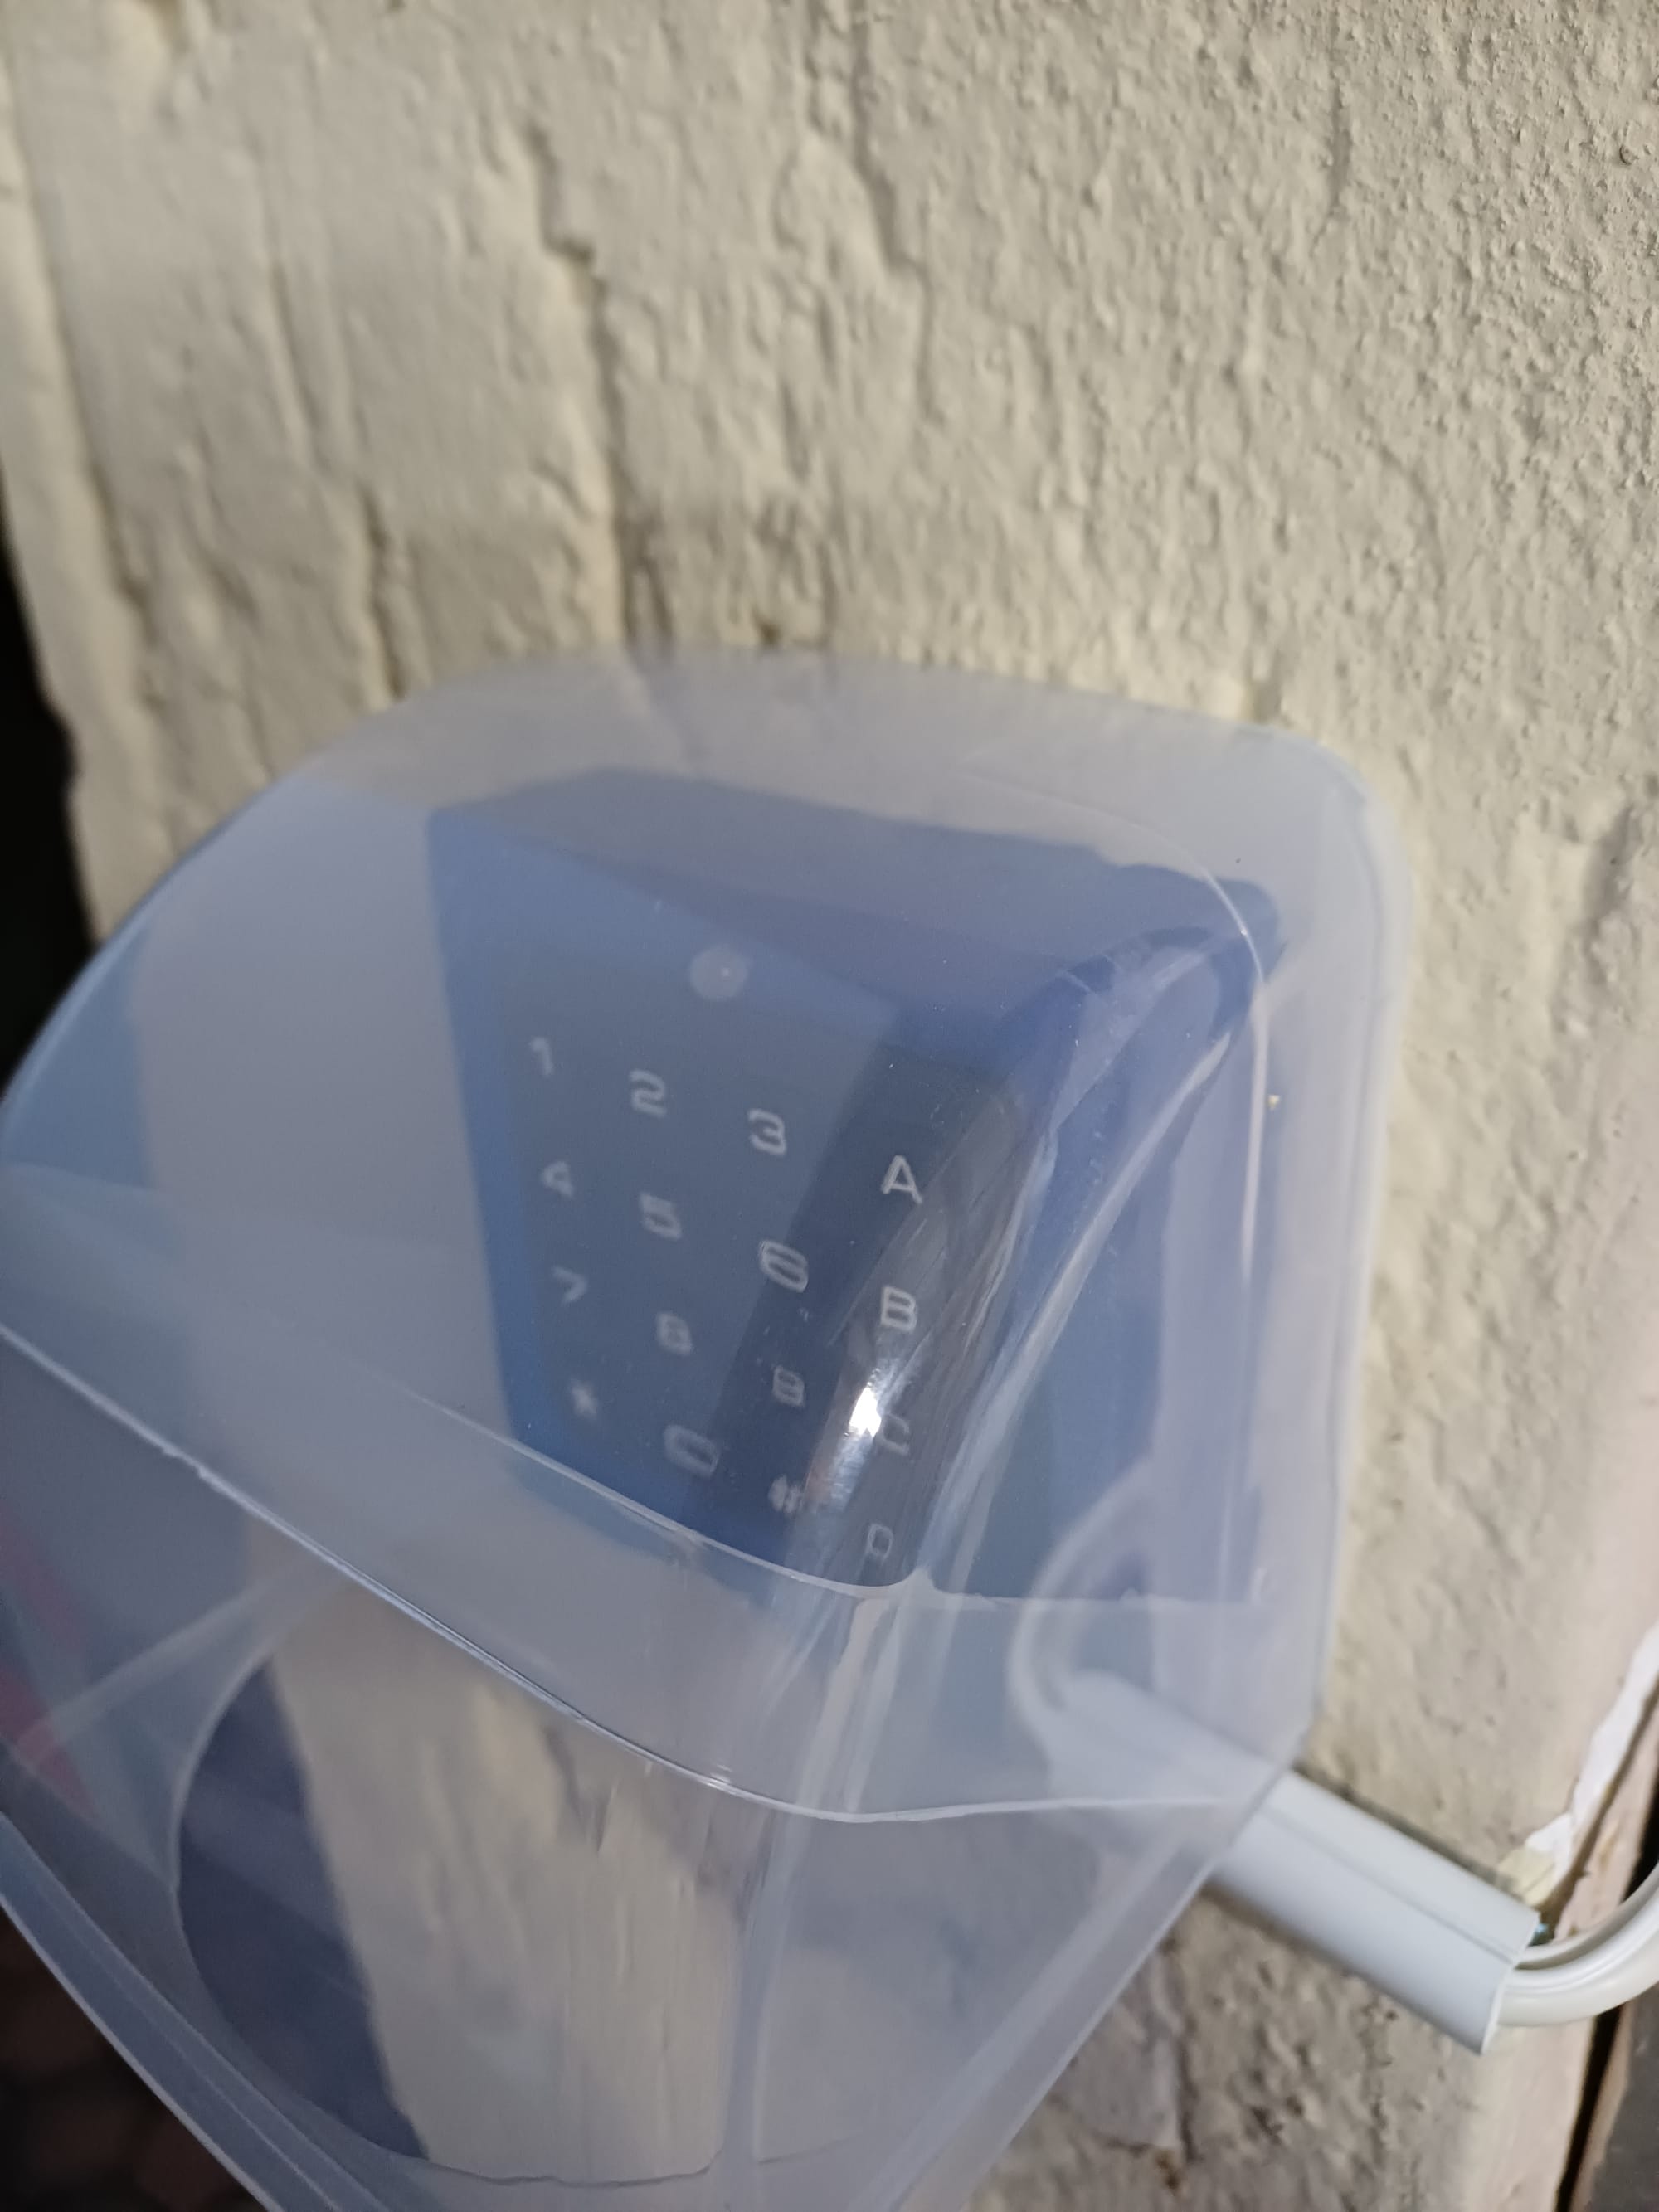
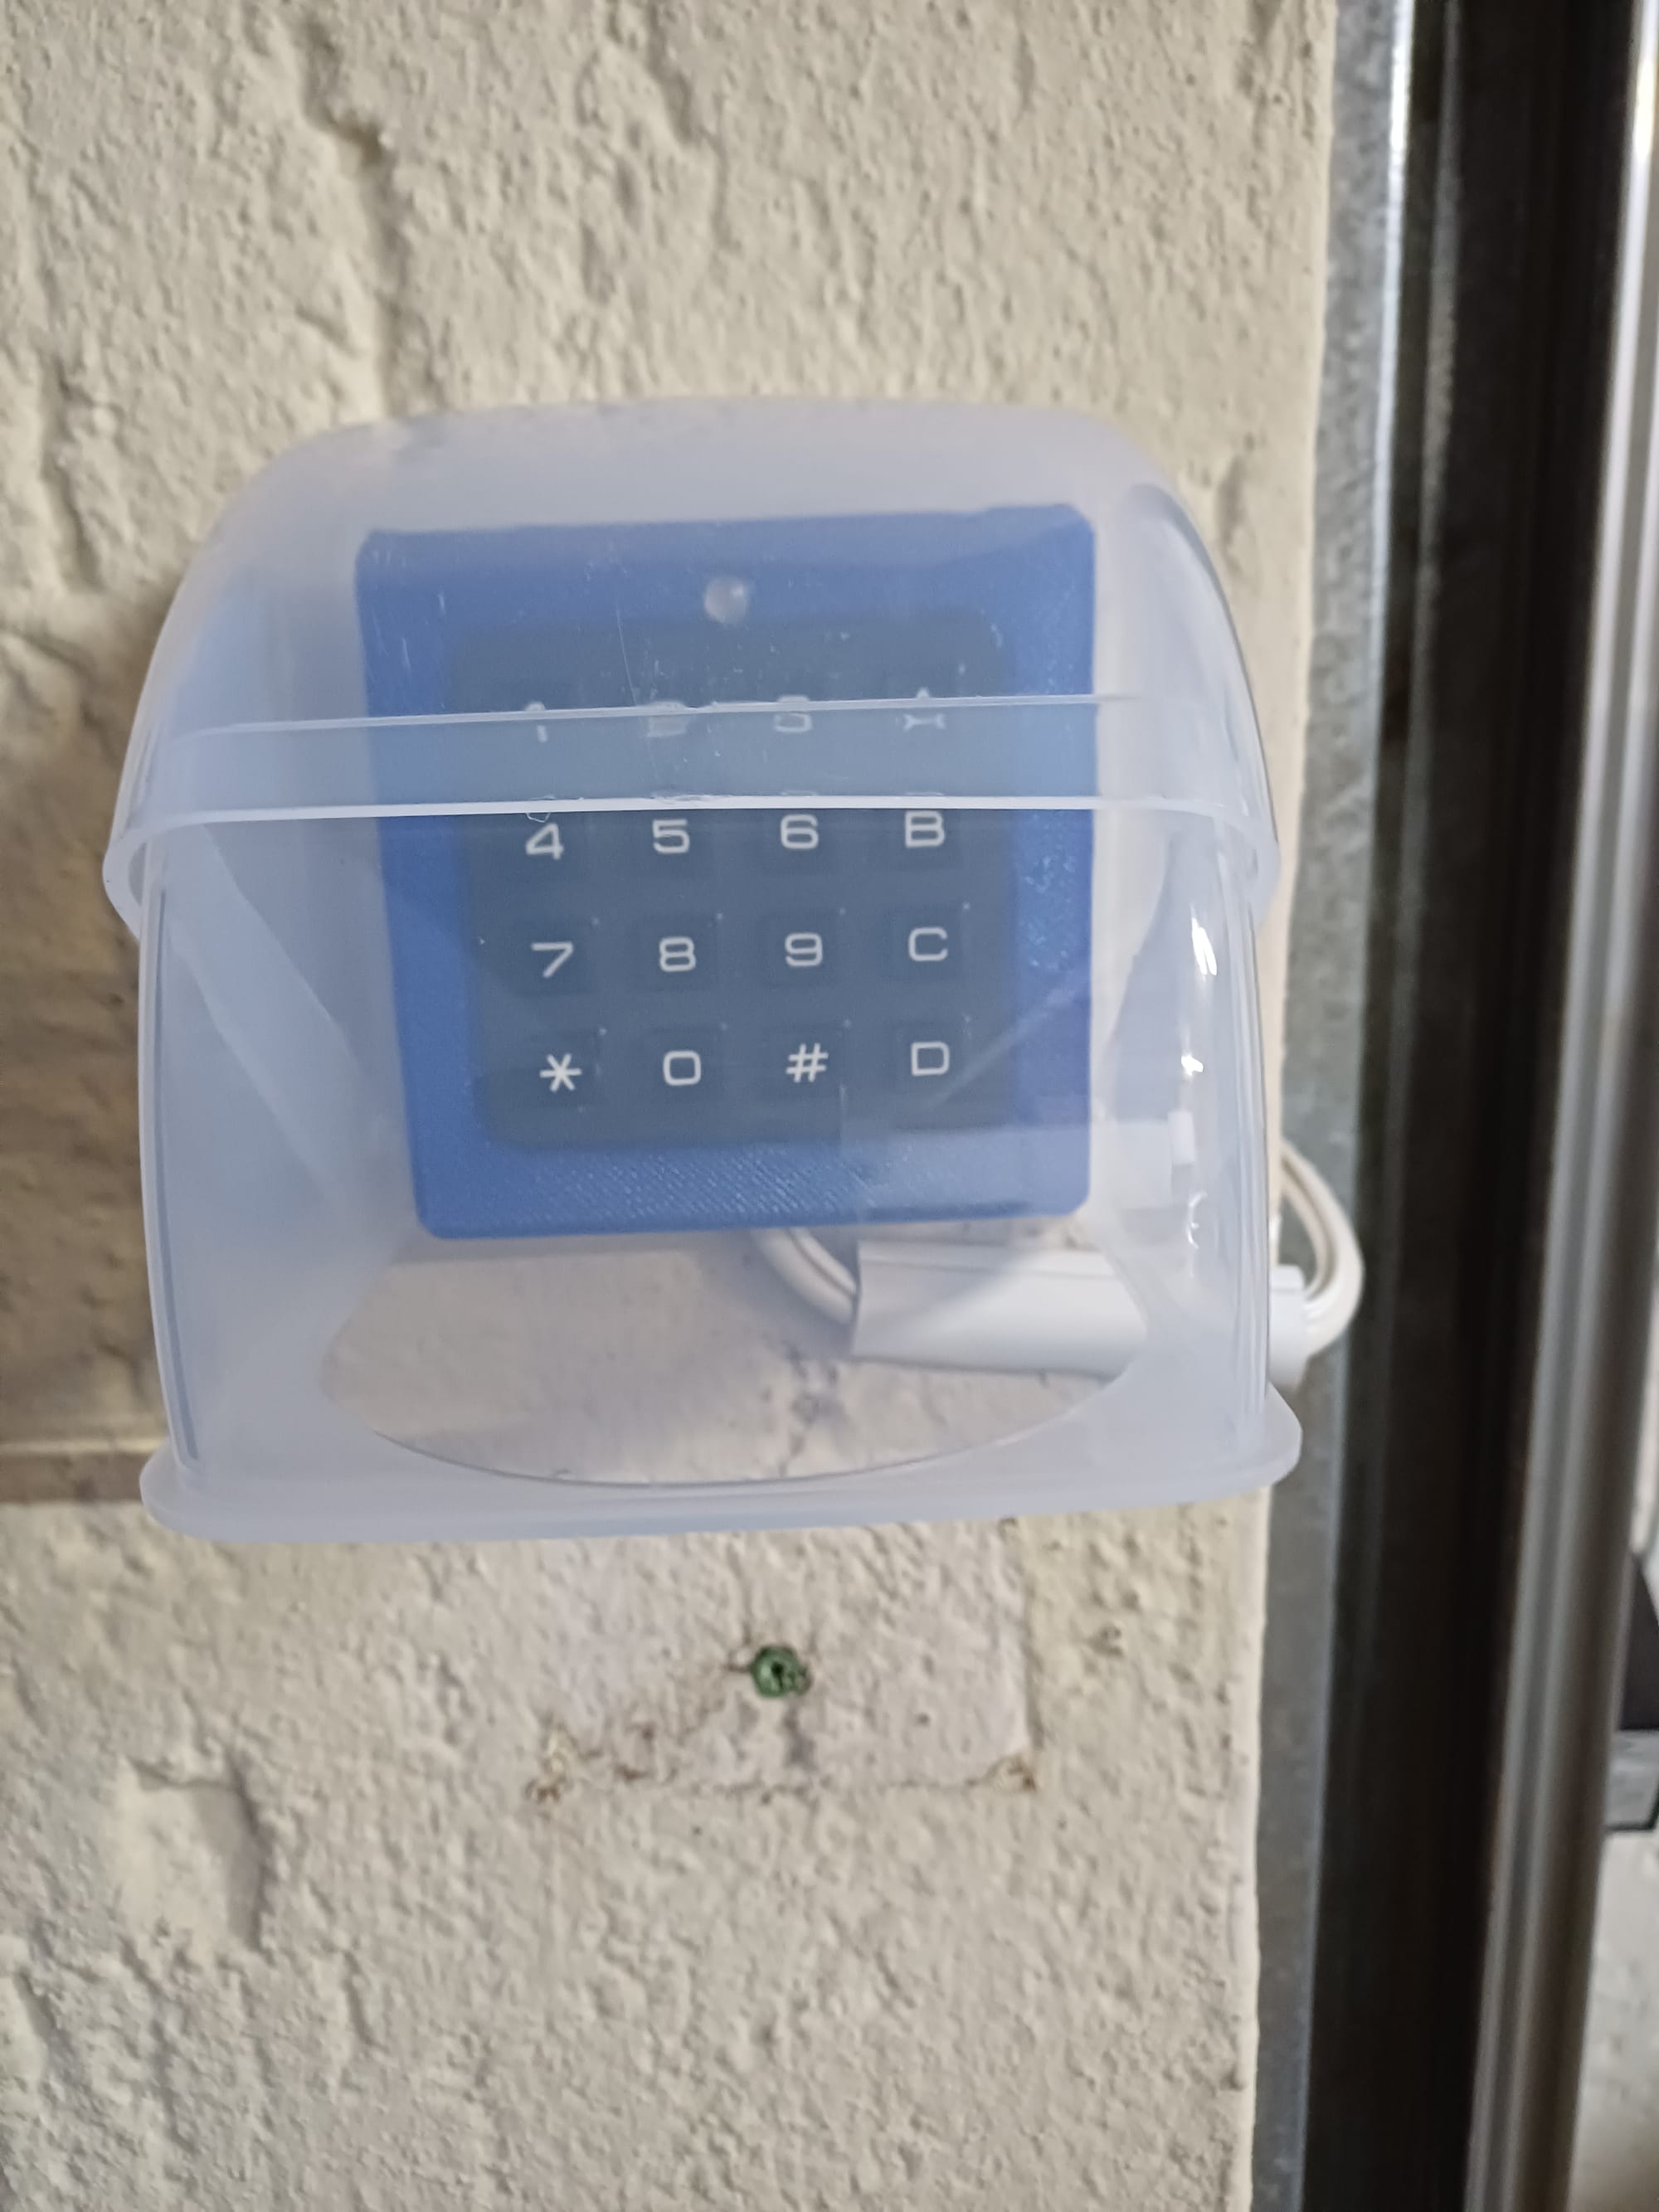
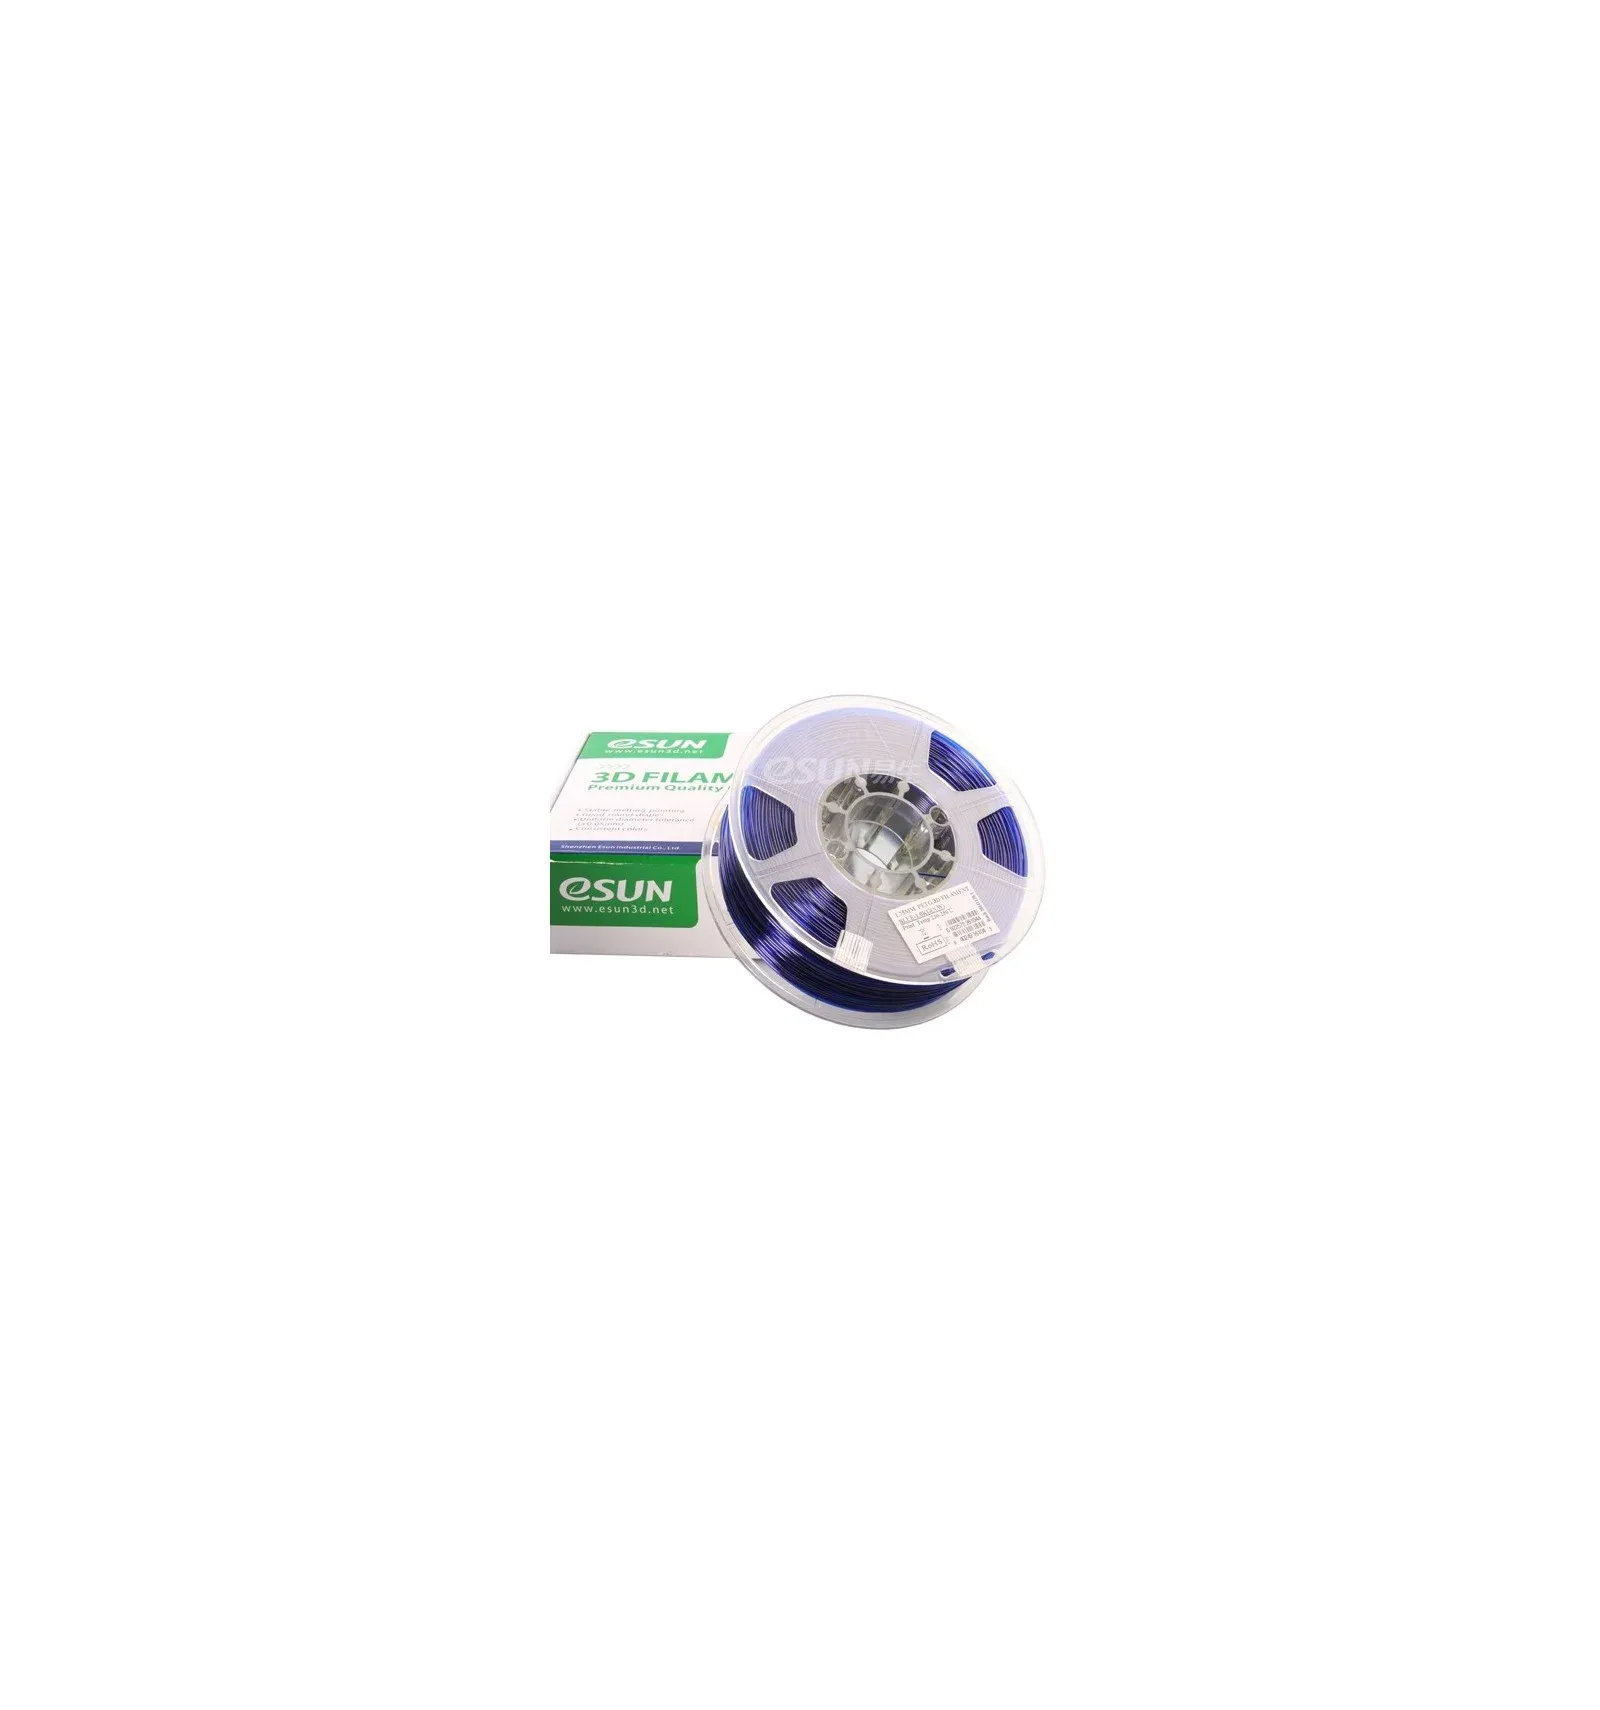
I printed the enclosure in transparent royal-blue PETG, which gives it a beautiful glowing effect when the WS2812B lights up and mostly just when the sun hits it. It also feels significantly sturdier and more heat-resistant than PLA—important in South African summers.
To top it off, I ordered a weather guard online to protect the keypad from rain and sun. It fits perfectly over the enclosure and looks surprisingly "professional".
Bringing It All Together
The final build is:
- Fully responsive
- OTA-updateable
- Integrated into Home Assistant
- Visually clean (inside and out)
- More robust against weather
- Easier to maintain and extend
And best of all, the constant “press Cancel + # until it works” days are over.